


Build a Full Stack CRUD App With GraphQL, MongoDB, NextJS, NextAuth, and TypeScript


Table of contents
- Building the backend 💻
- Deploying the backend 🚀
- Building the frontend 💻
- Creating a Next.js app
- Basic cleanup and setup
- Setting up authentication with NextAuth
- Creating the /todos page
- Fetching data with Apollo Client
- Creating our to-dos related components
- Adding the create and edit functionalities with Server Actions
- Creating the edit to-do page
- Creating a not found to-do page
- Running mutations on Client Components
- Deploying the front-end 🚀
- Post-deployment update
Building full-stack apps might sound scary and challenging, especially when working alone and not knowing which tools to use, where, and how to deploy the app 🤯.
However, this article will teach you two things:
the main one - basics of GraphQL, MongoDB, Next.js 13 (App Router), and NextAuth.js. This means the main goal of this article will be to learn how to work with these tools.
how to go from setting up the back-end (a basic one in which we'll design our API and handle DB connection) and the front-end of a CRUD project to deploying it to production by building a to-do list app.
With that being said, the whole tech stack will be the following:
TypeScript
GraphQL, which means:
Apollo Server v4 - to be used on the backend
Apollo Client v3 - to be used on the frontend
FYI, we will use
@apollo/experimental-nextjs-app-supportpackage, which is created to supplement the@apollo/clientpackage and add primitives to support React Server Components and SSR in the Next.jsappdirectory.While it is still an experimental package, it does the job very well. Here's a detailed explanation of why this package is needed.
codegen (GraphQL Code Generator) - to generate typed GraphQL code
MongoDB, that is:
- mongoose - to connect our backend with the database
Next.js (App Router) - to develop the front-end of the app
NextAuth v4 - for authentication
TailwindCSS - for styling (irrelevant to the main focus of the article but just so you know)
And it is important to mention that we will use one repository for the backend and another one for the frontend.
Without further ado, let's now get started :)
Building the backend 💻
We are going to use yarn to build the backend since we'll need its speed boost at build time when deploying.
Basic project structure
Let's first create a new directory for the project and call it as you wish.
After that, run yarn init --yes in the terminal and add "type": "module" to the package.json file. This is because we'll need our JavaScript files to be loaded as ES modules so that top-level await can be used later.
Then, create a src folder in which there'll be all of our backend code.
Now, as we are going to use TypeScript, let's install the dependencies:
yarn add typescript @types/node -D
Next, create a tsconfig.json file and add this config:
{
  "compilerOptions": {
    "rootDirs": ["src"],
    "outDir": "dist",
    "lib": ["es2020"],
    "target": "es2020",
    "module": "esnext",
    "moduleResolution": "node",
    "esModuleInterop": true,
    "types": ["node"],
    "strict": true,
    "forceConsistentCasingInFileNames": true,
    "allowJs": true,
    "baseUrl": ".",
    "paths": {
      "db/*": ["src/db/*"],
      "graphql/*": ["src/graphql/*"],
      "generatedTypes/*": ["src/__generated__/*"],
      "utils/*": ["src/utils/*"]
    }
  },
  "include": ["src"]
}
In short, this file says that a dist folder will be created and it will be the output folder for all emitted files that come from the src folder.
There's also a paths object that will be used through the development of this project but is completely optional as it won't affect anything other than the mere files imports so that we don't end up with imports like import something from "../../etc". If you decide to continue with this config, I recommend you install resolve-tspaths as a dev dependency.
yarn add resolve-tspaths -D
This package helps solve the issue about tsc (which is the script that will be used to compile the TypeScript file) not converting the path aliases to proper relative paths.
Next, add the scripts object to the package.json:
"scripts": {
    "build": "tsc; resolve-tspaths;",
    "start": "node ./dist/index.js",
}
Running yarn build will compile the TypeScript code into JavaScript and move them to the dist folder. Then, all path aliases will be converted to proper relative paths. And, running yarn start will start the project locally by running index.js (to be created) from the dist folder.
With this, we're now ready to start by implementing the MongoDB-related code.
MongoDB code
Before adding any code, let's create a new database in MongoDB Atlas:
Go to MongoDB Atlas, then sign in and configure a project by following the given steps.
In the Overview section, click on the "Create" button to create a new database deployment.
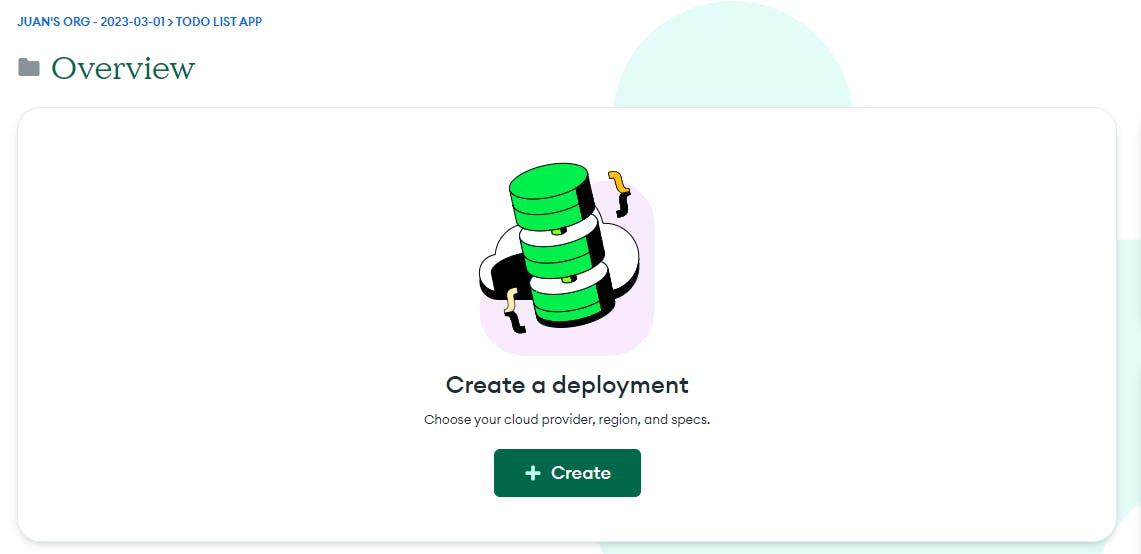
There, select the "M0" option to create a free cluster, and click on "Create".
After that, you'll be redirected to a section like this:
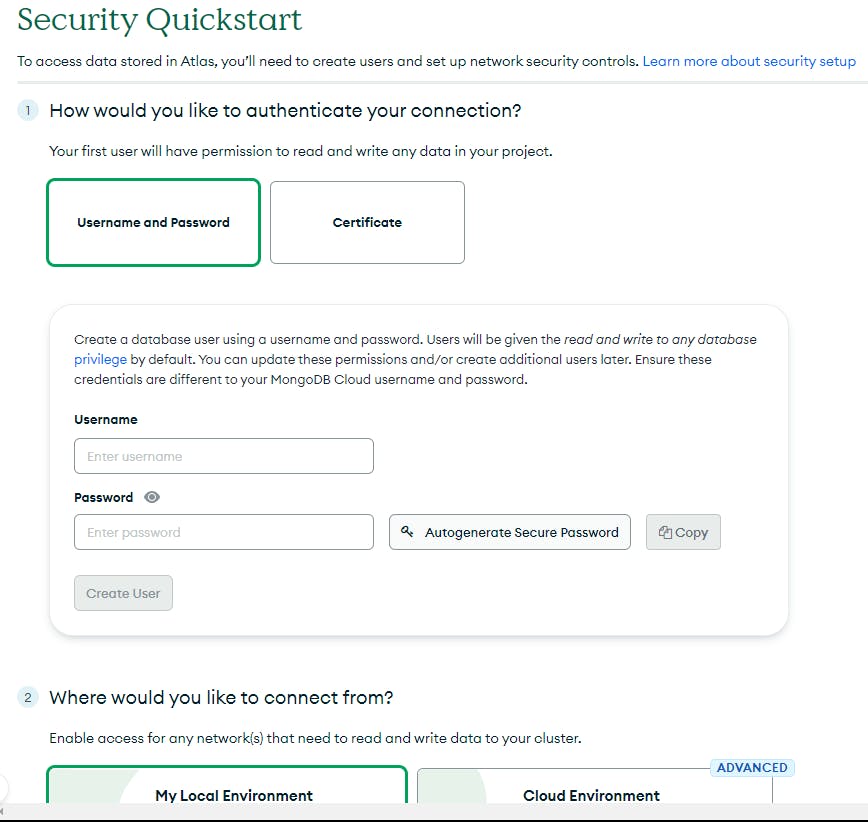
There, add a username and a password which you will need to connect to the DB (so, save it somewhere). These credentials must be different from your real username and password for security reasons.
After that, in the Add entries to your IP Access List section, add
0.0.0.0/0to allow access from anywhere.Finally, click on "Finish and Close".
With this, you should have a MongoDB Cluster ready for use:

Now, to connect to this database deployment from the code, we will need a MongoDB Atlas connection string that looks like this: mongodb+srv://<username>:<password>@name-of-your-cluster.mongodb.net/. Here, <username> and <password> are the credentials you created previously.
To get this connection string, click on "Connect", and a window like this will pop up:
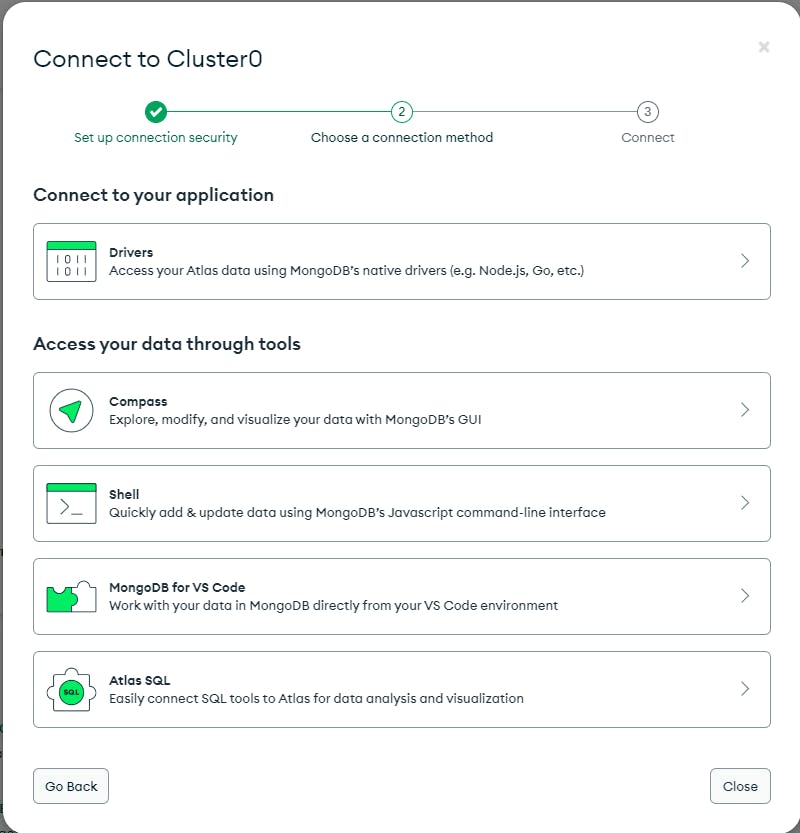
Select "Drivers" from "Connect to your application". Then, copy the connection string and replace the missing fields with their respective values.
Also, if you want to specify the database to work with, add its name at the end of the connection string. For example, in our case, the database name can be "todo-app". So, the connection string should be: mongodb+srv://<username>:<password>@name-of-your-cluster.mongodb.net/todo-app. If you don't specify a database name, a database named "test" will be created by default.
With this, now we should be able to connect to our database with a connection string.
By the way, if you want to configure a database to work with while in development mode (on localhost), you can use mongodb://localhost/<databaseName>.
Setting up the connection to the database
Now, let's get back to the repository and install mongoose and dotenv as dev dependencies:
yarn add mongoose dotenv -D
Then, create a folder called db inside the src. There, create an index.ts file which will contain the code to connect to the database:
import { connect } from 'mongoose';
import 'dotenv/config';

const { MONGODB_URI } = process.env;

if (!MONGODB_URI) {
  throw new Error(
    'The MONGODB_URI environment variable is required but was not provided.'
  );
}

export const connectToDB = async () => {
  try {
    const { connection } = await connect(MONGODB_URI);

    if (connection.readyState === 1) {
      console.log('Connected to DB successfully.');

      return connection;
    }
  } catch (error) {
    console.log(error);

    return;
  }
};
Here, we configure dotenv by adding import 'dotenv/config' to load environment variables from the .env file. There we will have a MONGODB_URI variable which is the connection string URI from the previous process. If that environment variable is not provided, an error will be thrown. If it is, we pass it as an argument to the connect method.
After that, create an index.ts file in the src folder and call this new connectToDB function there.
import { connectToDB } from "db/index";

const connection = await connectToDB();

if (!connection) {
  throw new Error('Could not connect to DB');
}
If for some reason we can't connect to the database, an error is thrown. This is because every GraphQL operation we will create will depend on a connection to a database. If there's no connection, there's no point in starting the GraphQL server at all.
Creating a MongoDB schema and model
Now, create a models folder inside db and add a Task.ts file with this code:
import mongoose from 'mongoose';

type Task = {
  title: string;
  description: string;
  done: boolean;
  authorEmail: string;
  createdAt: Date;
  updatedAt: Date;
};

type TaskModelType = mongoose.Model<Task>;

const TaskSchema = new mongoose.Schema<Task>(
  {
    title: {
      type: String,
      required: true,
    },
    description: {
      type: String,
    },
    done: {
      type: Boolean,
      default: false,
    },
    authorEmail: {
      type: String,
      required: true,
    },
  },
  {
    timestamps: true,
  }
);

export const TaskModel: TaskModelType =
  mongoose.models.Task || mongoose.model<Task>('Task', TaskSchema);
Here, we define the schema by creating a new instance of Schema from mongoose and save it in a variable called TaskSchema.
Then, to be able to work with that schema, we convert it into a Model by calling the model method. The first argument is the name of the collection your model is for in its singular form (because MongoDB will eventually transform it into plural); and, the second argument is the schema.
Also, notice that when converting into a Model, we first check if there's already a model called Task in the Mongoose models cache by using models.Task || etc. This is just to ensure that a model is defined only once and therefore avoid unexpected issues in the future. Doing this is optional but if you want to add an extra layer of safety, this will do the job😉.
To this point, we're now ready to work with the database from anywhere in the project.
GraphQL code
As we're going to work with Apollo Server, let's install the @apollo/server and graphql packages.
yarn add @apollo/server graphql
Setting up GraphQL Code Generator
Also, as we want to have typed GraphQL-related code, let's use GraphQL Code Generator which, basically, is a plugin-based tool that helps generate typed GraphQL queries, mutations, subscriptions, and resolvers. So, install @graphql-codegen/cli, @graphql-codegen/typescript-resolvers, and @graphql-codegen/typescript as dev dependencies:
yarn add @graphql-codegen/cli @graphql-codegen/typescript-resolvers @graphql-codegen/typescript -D
Then, create a codegen.ts file in the root of the project and add this code:
import type { CodegenConfig } from '@graphql-codegen/cli';

const config: CodegenConfig = {
  schema: './src/graphql/tasks/typeDefs.graphql',
  generates: {
    'src/__generated__/tasks.ts': {
      config: {
        scalars: {
          Date: 'Date',
        },
        useIndexSignature: true,
      },
      plugins: ['typescript', 'typescript-resolvers'],
    },
  },
};

export default config;
Here, we export an object called config that includes:
schema: a local path to a file that exports the schema to generate code from. In this case, it will be a file named
typeDefs.graphqlthat we'll create after this and will live undersrc/graphql/tasks.generates: an object whose key is the output path for the generated code, and the value represents a set of relevant options for that specific file.
config: set of options we would like to provide to the specified plugins (
pluginsfield below).scalars: a type that qualifies the data a GraphQL field resolves. GraphQL provides a handful of scalar types by default:
Int,Float,String,BooleanandID. However, with thisscalarsobject config, you can define custom scalars in case the default ones are not enough. In this object, the key is the scalar type name, and its value is a string that determines its type. Here, we create 1 custom scalar type:Datewhich is of typeDate, and will be used as the type of any Date field in the project.
plugins: a list of plugins to use when generating the file. Here, we specify the
typescriptandtypescript-resolversplugins that were installed previously.
Once done with this config file, update the scripts field from the package.json with a new script that will be used to generate GraphQL code using the codegen.ts file.
"scripts": {
  "build": "yarn run generate; tsc; resolve-tspaths;",
  "start": "node ./dist/index.js",
  "generate": "graphql-codegen"
}
Running yarn run generate will execute graphql-codegen which targets a codegen.ts or codegen.yml file by default. This new script is also added to the build script so that every time we run yarn run build, we make sure we have up-to-date typed GraphQL code.
Creating the schema
Now, we'll need a schema to work with throughout our app. As per the docs, a schema is used by our GraphQL server to describe the shape of the available data and they also specify exactly which queries and mutations are available for clients to execute.
So, create a new folder inside the src and call it graphql. Inside this new folder, create another one called tasks and inside of it, create a typeDefs.graphql file that will contain the schema code:
scalar Date

type Task {
  authorEmail: String!
  id: ID!
  title: String!
  description: String
  done: Boolean!
  createdAt: Date
  updatedAt: Date
}

input TaskInput {
  title: String!
  description: String
}

interface MutationResponse {
  code: Int!
  success: Boolean!
  message: String!
}

type TaskMutationResponse implements MutationResponse {
  code: Int!
  success: Boolean!
  message: String!
  task: Task
}

type Query {
  tasks(authorEmail: String!): [Task!]!
  task(id: ID!): Task!
}

type Mutation {
  createTask(authorEmail: String!, task: TaskInput!): TaskMutationResponse
  editTaskBody(id: ID!, task: TaskInput!): TaskMutationResponse
  editTaskStatus(id: ID!, done: Boolean!): TaskMutationResponse
  deleteTask(id: ID!): TaskMutationResponse
}
When you create a custom scalar type (what we did in the codegen.ts file), you have to add scalar ScalarTypeName inside your schema file, being ScalarTypeName the key you specified there. As you can see, we have scalar Date as that is the scalar type we defined.
Below, we add an Object Type (type keyword) called Task which represents the fields a to-do item can have. types in GraphQL schemas work similarly to type aliases in TypeScript. The return types of the fields can be a scalar, an object, an enum, a union, or an interface.
String!. In GraphQL, required fields are known as Non-Null valuesNext, we add an Input type called TaskInput. As per the docs, Input types are particularly valuable in the case of mutations, where you might want to pass in a whole object to be created. They are defined similarly to Object Types but with the input keyword instead. In our case, we use it as one of the arguments for two mutation operations (createTask and editTaskBody).
Then, an interface called MutationResponse is created as a way of providing more response details to the client when executing mutations. This interface is also used as a supplement to a type called TaskMutationResponse which is used as the return type of every mutation to tasks.
After that, we define the queries that clients will be able to execute against the server by adding the Query type. Each field inside defines the name and return type of a query. Here, we add tasks which accepts a required parameter called authorEmail and whose value must be a string. This query returns an array - it can be empty or if it contains items, they must be Tasks. Also, there's a task query that accepts a required ID parameter and returns a Task item.
Finally, we add the Mutation type to define the available mutation operations that can be executed by clients. In our case, the available mutations are: createTask, editTaskBody, editTaskStatus and deleteTask.
Every GraphQL service has a Query type and, optionally, a Mutation type. The main difference between them is that the Query type defines entry points for read operations, while the Mutation type defines entry points for write operations.
Now, run yarn generate and you should have a __generated__ folder created with a tasks.ts file inside whose content is all of the generated types 👏.
Defining a resolver
At this point, Apollo Server doesn't know what to do when a query or mutation is executed. To solve this, we create resolvers for each field of the Query and Mutation types. A resolver is a function that provides the instructions for turning a GraphQL operation into data.
So, create a new file called resolvers.ts inside graphql/tasks and add this code without any logic so that I can explain to you some important stuff:
import { Resolvers } from 'generatedTypes/tasks';

export const resolvers: Resolvers = {
  Query: {
    tasks: async (parent, args, context, info) => {},
    task: async (parent, args, context, info) => {},
  },
  Mutation: {
    createTask: async (parent, args, context, info) => {},
    editTaskBody: async (parent, args, context, info) => {},
    editTaskStatus: async (parent, args, context, info) => {},
    deleteTask: async (parent, args, context, info) => {},
  },
};
Let's take a look at what is in this code:
A
resolversobject is created and exported because it will be needed in a further step.That object's type is
Resolversand it comes from the generated types from GraphQL Code Generator.Inside, there are two properties:
QueryandMutation. Each one of them includes the resolver functions for each of their fields.Every resolver function is async because we'll deal with Promises that are returned from the database operations that will be executed. They accept 4 optional arguments:
parent,args,context, andinfo(in that same order).In this tutorial, we will only use
argsandcontext:argsare the arguments a client sends when executing a query/mutation.contextis an object that is shared across all resolvers and that can contain information, logic, and whatever you want to expose.Refer to the Resolver arguments documentation to learn about these and the other arguments more deeply.
Now, before adding the logic to each resolver, let's set up the Apollo Server so that we leave it ready for use 👀.
Setting up Apollo Server
Head to the src/index.ts file where we call the connectDB function to connect to our database.
After that function call and its respective if statement, add this code:
import { ApolloServer, BaseContext } from '@apollo/server';
import { startStandaloneServer } from '@apollo/server/standalone';
import { readFileSync } from 'fs';
import { resolvers } from 'graphql/tasks/resolvers';

// code to connect to DB

const typeDefs = readFileSync('src/graphql/tasks/typeDefs.graphql', 'utf-8');

const server = new ApolloServer<BaseContext>({
  typeDefs,
  resolvers,
});

const { url } = await startStandaloneServer(server);

console.log(`🚀 Server ready at: ${url}`);
From top to bottom, as we cannot export our schema from the graphql/tasks/typeDefs.graphql file, we use readFileSync from the fs package to read it and store it in a variable called typeDefs.
Below, there is a server variable that creates a new instance of the ApolloServer class from the @apollo/server package. The ApolloServer constructor requires two parameters: your schema definition (typeDefs variable from above) and your resolvers (coming from graphql/tasks/resolvers).
After that, we await the call to the startStandaloneServer function from @apollo/server/standalone and pass in the Apollo Server instance we created in the previous step as the first argument. This call returns an object whose only property is a url string. Also, what this startStandaloneServer does is it first creates an Express app, then installs the Apollo Server instance as middleware and, finally, prepares your app to handle requests. By default, your app will listen to port 4000 if you don't specify otherwise. To specify a different one, you can add something like this as the second parameter:
{
  listen: { port: someNumber},
}
Now, trying to start our server might throw an error because of type checks in the resolvers file. Anyways, we won't be able to do anything because there's no logic inside each resolver function as of yet. So, let's add some code to each one of them 😉. For this, we will create data sources and I will explain to you why and what they are.
Creating data sources
To avoid making our resolvers object too big because of all of the database operations and everything else, let's create a new folder called datasources inside the graphql folder. A data source is a pattern for managing connections to databases, and fetching data from a particular service; that is, they're good for keeping all the business logic in one place.
Inside this folder, create a Task.ts file and add this code:
import { TaskModelType } from 'db/models/Task';

export class TasksDataSource {
  private taskModel;

  constructor(taskModel: TaskModelType) {
    this.taskModel = taskModel;
  }
}
Here, we declare a class called TasksDataSource which is going to have a private taskModel variable. Usually, in JavaScript, you should not use the private keyword to create private class members, instead, you use a hash (#). But, as we're using TypeScript, the private keyword won't emit any JavaScript code at the end. So, this is just for type safety during development.
Below, there's the constructor method that accepts a taskModel parameter whose type is TaskModelType, which is the type of the Task MongoDB model that was created earlier. This argument is used to initialize the class with a MongoDB model that can be used to perform operations in any future method inside this class.
Now, below the constructor method, let's add the following private helper methods.
import { TaskModelType } from 'db/models/Task';
import { Task, TaskMutationResponse } from 'generatedTypes/tasks';
import { Task as MongoTaskType } from 'db/models/Task';
import { Document, Types } from 'mongoose';

export class TasksDataSource {
  // ...

  private getMappedTask(
    task: Document<unknown, {}, MongoTaskType> &
      Omit<
        MongoTaskType & {
          _id: Types.ObjectId;
        },
        never
      >
  ): Task {
    return {
      id: task._id.toString(),
      title: task.title,
      description: task.description,
      done: task.done,
      authorEmail: task.authorEmail,
      createdAt: task.createdAt,
      updatedAt: task.updatedAt,
    };
  }

  private getTaskMutationErrorResponse(
    error: unknown,
    defaultErrorMessage: string
  ): TaskMutationResponse {
    return {
      code: 400,
      message: error instanceof Error ? error.message : defaultErrorMessage,
      success: false,
    };
  }

  private getTaskMutationSuccessResponse(
    task: Task,
    message: string
  ): TaskMutationResponse {
    return {
      code: 200,
      message,
      success: true,
      task,
    };
  }
}
These helper methods will help us avoid repeating the same code every time.
getMappedTask accepts a task parameter that is of type Document<unknown, ...> & ... (the return type of the mongoose operations). It returns a Task object.
getTaskMutationErrorResponse accepts an error parameter whose type is unknown because we never know what type of error we will get, and a defaultErrorMessage parameter that is a string. It returns an object that contains a code field whose value is 400, a message that can be the value of the message property from error in case it is an instance of the Error class, or the defaultErrorMessage value if it is not an instance of that class. Finally, it also contains a success field whose value is false.
getTaskMutationSuccessResponse is similar to getTaskMutationErrorResponse but in this case, it returns a success response as the name states. It accepts a task parameter that is of type Task, and a message which will be the value of the message property from the returned object.
Now, after these helper methods, add the method to get all tasks from a specific user:
async getAllTasksByAuthorEmail(authorEmail: string) {
    try {
      const tasks = await this.taskModel.find({ authorEmail });

      const mappedTasks = tasks.map((task) => {
        const mappedTask = this.getMappedTask(task);

        return mappedTask;
      });

      return mappedTasks;
    } catch {
      return [];
    }
  }
As you can see, this is an async method because we will deal with Promises when working with the database. It accepts an authorEmail parameter which is then used as the filter field to find a user's tasks. There's a try catch statement to handle the asynchronous code and be able to handle errors. Inside the try catch, the find method is used to find a particular document inside the database. In this case, we look for tasks whose author's email is the value of authorEmail.
Task model.You might wonder why we're using authorEmail in our schema to look for an item and not another field, like id or something like that... well, the reason is that in the frontend we will implement a basic authentication flow with NextAuth.js and one of the values we get from a session is the user's email, which in this case is considered the "unique" value for the sake of simplicity and not getting too extended. In a real-world project, this unique value would be a different field, like an id or token.
Next, add the method to find a task by its ID:
async getTaskById(id: string) {
    try {
      const task = await this.taskModel.findById(id);

      if (!task) {
        throw new Error(TaskResponseMessages.NOT_FOUND);
      }

      const mappedTask = this.getMappedTask(task);

      return mappedTask;
    } catch {
      return null;
    }
  }
This method accepts an id parameter which is passed as the argument to the findById method from the Task model. If no task is found, an error is thrown and null is returned as the response. If a task was found, it is returned.
Also, there is a new file we will add to avoid implementing magic strings. This file will store all the constants (strings) to be used moving forward. So, before adding the other methods, let's create a utils folder, and inside add a constants.ts file. There, add this variable:
export const TaskResponseMessages = {
  BODY_UPDATED: 'Task info updated successfully.',
  CREATED: 'Task created successfully.',
  DELETED: 'Task deleted successfully.',
  ERROR_CREATING: 'Error creating task. Please try again.',
  ERROR_DELETING: 'Error deleting task. Please try again.',
  ERROR_UPDATING_BODY: 'Error updating task info. Please try again.',
  ERROR_UPDATING_STATUS: 'Error updating task status. Please try again.',
  NOT_FOUND: 'Task not found.',
  STATUS_UPDATED: 'Task status updated successfully.',
};
Awesome 👏! Let's now continue with adding the method to create tasks:
  async createTask(
    taskInput: TaskInput,
    authorEmail: string
  ): Promise<TaskMutationResponse> {
    try {
      const createdTask = await this.taskModel.create({
        title: taskInput.title,
        description: taskInput.description,
        authorEmail,
      });

      const mappedTask = this.getMappedTask(createdTask);

      return this.getTaskMutationSuccessResponse(
        mappedTask,
        TaskResponseMessages.CREATED
      );
    } catch (error) {
      return this.getTaskMutationErrorResponse(
        error,
        TaskResponseMessages.ERROR_CREATING
      );
    }
  }
In this method, we accept taskInput of type TaskInput and authorEmail of type string. Inside the try catch statement, the create method from this.taskModel is used to create a new document. We pass in a title, a description, and the authorEmail from the method's arguments list. Then we get a mapped task using the getMappedTask helper method and, finally, a mutation success object is returned by using the getTaskMutationSuccessResponse helper method. As arguments, we pass in the mapped task from the previous step and a message which is a constant coming from another file so that we don't implement magic strings 😉.
After that, inside the catch, a mutation error object is returned by using the getTaskMutationErrorResponse helper method whose arguments are the error from the catch (error) and a default error message that comes from a constant in a separate file.
.
Now, let's add the method to edit the title and the description of a task:
  async editTaskBody(
    taskId: string,
    newTaskBody: TaskInput
  ): Promise<TaskMutationResponse> {
    try {
      const updatedTask = await this.taskModel.findByIdAndUpdate(
        taskId,
        {
          title: newTaskBody.title,
          description: newTaskBody.description,
        },
        { new: true, runValidators: true }
      );

      if (!updatedTask) {
        throw new Error(TaskResponseMessages.NOT_FOUND);
      }

      const mappedUpdatedTask = this.getMappedTask(updatedTask);

      return this.getTaskMutationSuccessResponse(
        mappedUpdatedTask,
        TaskResponseMessages.BODY_UPDATED
      );
    } catch (error) {
      return this.getTaskMutationErrorResponse(
        error,
        TaskResponseMessages.ERROR_UPDATING_BODY
      );
    }
  }
This method accepts a taskId string, and a newTaskBody of type TaskInput. Inside, we use the findByIdAndUpdate method from mongoose to find a task whose ID is the value of taskId (first argument). As the second argument, this method accepts an update argument which is the update query command to perform on the document. Here, we specify that we want to update the title and the description field of the target document by adding:
{
 title: newTaskBody.title,
 description: newTaskBody.description,
}
This is similar to doing:
{
 $set: {
   title: newTaskBody.title,
   description: newTaskBody.description,
 },
}
The only difference is that when you don't specify an Update Operator like $set, like we do in this case, this argument is sent as a $set operation by default. This is intentionally made to prevent accidentally overwriting your document.
Now, after that second argument, the third one is an options object in which we have two properties: new and runValidators.
By default, after updating a document, the original version (the version before the update) of it is returned. If you want to get the modified version (the one after the update), you have to add { new: true } as an option. Finally, setting runValidators to true is to run update validators on this operation. That is, it is to allow for the update operation to be validated against the model's schema.
After this, if no updated task was returned, probably because no task was found in the first place, then an error is thrown saying there was no task found.
Next, a mutation success object is returned by passing in a mapped updated task as the first argument and a success message as the second. In case there was an error, inside the catch, a mutation error object is returned.
Okay... so, now, let's add the method to edit a task done status:
  async editTaskStatus(
    id: string,
    done: boolean
  ): Promise<TaskMutationResponse> {
    try {
      const updatedTask = await this.taskModel.findByIdAndUpdate(
        id,
        {
          done,
        },
        { new: true, runValidators: true }
      );

      if (!updatedTask) {
        throw new Error(TaskResponseMessages.NOT_FOUND);
      }

      const mappedUpdatedTask = this.getMappedTask(updatedTask);

      return this.getTaskMutationSuccessResponse(
        mappedUpdatedTask,
        TaskResponseMessages.STATUS_UPDATED
      );
    } catch (error) {
      return this.getTaskMutationErrorResponse(
        error,
        TaskResponseMessages.ERROR_UPDATING_STATUS
      );
    }
  }
In this method, an id of type string and a done boolean are accepted as arguments. We use the findByIdAndUpdate method to find a document by its ID and then update it. A similar procedure to the one from the previous method. So, the explanation of what happens there is pretty much the same.
Finally, the last method will be the one to delete a task:
  async deleteTask(id: string): Promise<TaskMutationResponse> {
    try {
      const deletedTask = await this.taskModel.findByIdAndDelete(id);

      if (!deletedTask) {
        throw new Error(TaskResponseMessages.NOT_FOUND);
      }

      const mappedDeletedTask = this.getMappedTask(deletedTask);

      return this.getTaskMutationSuccessResponse(
        mappedDeletedTask,
        TaskResponseMessages.DELETED
      );
    } catch (error) {
      return this.getTaskMutationErrorResponse(
        error,
        TaskResponseMessages.ERROR_DELETING
      );
    }
  }
This method accepts an id argument. We use the findByIdAndDelete method to which we pass in the id parameter from the method. If no task was found, an error is thrown like in the other methods. Then a mutation success object is returned in case a task was found and deleted successfully. If there was an error, a mutation error object is returned.
Having got to this point, we need to use all of these methods in their respective resolvers. To do this, let's first go back to the src/index.ts file and do the following:
Create a new context interface to be referenced in our server:
 export interface ContextValue extends BaseContext {
   dataSources: {
     tasks: TasksDataSource;
   };
 }
Next, in the Apollo Server initialization, swap out the
BaseContexttype with this newContextValuetype:const server = new ApolloServer<ContextValue>({ typeDefs, resolvers, });Then, add a context config to the
startStandaloneServerfunction call. Thiscontextfunction should be asynchronous:import { TaskModel } from 'db/models/Task'; import { TasksDataSource } from 'graphql/datasources/Task'; const { url } = await startStandaloneServer(server, { context: async () => { const tasksDataSource = new TasksDataSource(TaskModel); return { dataSources: { tasks: tasksDataSource, }, }; }, });
Now we can update the resolvers object:
import { Resolvers } from 'generatedTypes/tasks';

export const resolvers: Resolvers = {
  Query: {
    tasks: async (_parent, { authorEmail }, { dataSources }) => {
      const tasks = await dataSources.tasks.getAllTasksByAuthorEmail(
        authorEmail
      );

      return tasks;
    },
    task: async (_parent, { id }, { dataSources }) => {
      const foundTask = await dataSources.tasks.getTaskById(id);

      return foundTask;
    },
  },
  Mutation: {
    createTask: async (_parent, { authorEmail, task }, { dataSources }) => {
      const createdTask = await dataSources.tasks.createTask(task, authorEmail);

      return createdTask;
    },
    editTaskBody: async (_parent, { id, task }, { dataSources }) => {
      const updatedTask = await dataSources.tasks.editTaskBody(id, task);

      return updatedTask;
    },
    editTaskStatus: async (_parent, { id, done }, { dataSources }) => {
      const updatedTask = await dataSources.tasks.editTaskStatus(id, done);

      return updatedTask;
    },
    deleteTask: async (_parent, { id }, { dataSources }) => {
      const deletedTask = await dataSources.tasks.deleteTask(id);

      return deletedTask;
    },
  },
};
As mentioned before, we will only work with the args (2nd) and the context (3rd) parameters from each resolver.
Now, if you hover over the context parameter (the { dataSources } object), you'll notice that dataSources is of type any. And if you hover over the Resolvers type, you'll see that it is a generic type and if no context type is passed in, it defaults to any: Resolver<ContextType = any>. To fix this, there are 2 solutions:
Importing the
ContextValuetype from before and use it as a generic for theResolverstype:import { ContextValue } from "src/index"; export const resolvers: Resolvers<ContextValue> = { // ... }Updating the
codegen.tsfile by adding acontextTypefield inside theconfigfrom the generated file. ThiscontextTypefield works with thetypescript-resolversplugin and what it does is set a custom type for yourcontext. This custom type is added to all the resolvers without having to override the default context type with generics like what we did in the previous step:import type { CodegenConfig } from '@graphql-codegen/cli'; const config: CodegenConfig = { schema: './src/graphql/tasks/typeDefs.graphql', generates: { 'src/__generated__/tasks.ts': { config: { contextType: '../index#ContextValue', scalars: { Date: 'Date', }, useIndexSignature: true, }, plugins: ['typescript', 'typescript-resolvers'], }, }, }; export default config;As you can see, we added
contextType: '../index#ContextValue'. The value of this field should be the path to where your custom type is defined. And, the path should be relative to the generated file. There's also a hash referencing the exact name of the type.
Great 👏! Now, we are able to run queries and mutations. For this, run yarn build to build the app, and then run yarn start to start the server. You should see a log in your terminal similar to this:
$ node ./dist/index.js
Connected to DB successfully.
🚀 Server ready at: http://localhost:4000/
If you open that link, you'll be directed to a Sandbox that is loaded with your app's schema:

Okay, amazing 🎉!
Everything's looking nice so far but there's something extremely important to consider in your apps which is privacy. That is, we do not want users to be able to execute a query/mutation to check/update someone else's data from Postman or the Sandbox or anywhere outside the app without any sign of authentication 👀. Let's do that now 👇.
Adding authentication and authorization
Before adding any code for this, I want to clarify that, in this app, we will implement a vulnerable authentication and authorization check (you will see what I mean), but the main purpose is to learn how to add authentication and authorization to your GraphQL server, that is, where and how to add the logic to check if a user is authenticated, if they are the real owners of a task, if a user exists in the first place, and whatever else you want to check before executing a request.
Differentiating between authentication and authorization is crucial, so let me explain it to you in a few words:
Authentication is about validating two main things: if a user is logged in and if so, who that user is.
Authorization is about determining what an authenticated user is allowed to do or has access to.
To add authentication-related logic, go to the src/index.ts file and update the ContextValue interface by adding an authorizationToken field of type string:
export interface ContextValue extends BaseContext {
  authorizationToken: string;
  dataSources: {
    tasks: TasksDataSource;
  };
}
Next, update the context object from the startStandaloneServer function call by adding the following code:
const { url } = await startStandaloneServer(server, {
  context: async ({ req }) => {
    const authorizationToken = req.headers.authorization || "";

    // ...

    return {
      authorizationToken,
      // ...
    };
  },
});
Here, we use the req argument to access the headers object coming from every request. Inside the headers, we grab the value of the authorization property and save it in a variable which is then returned inside the context object along with the dataSources prop.
A common authentication flow is to use this token and check if there's a user in the database linked to it. If so, return the user, and if not, throw an UNAUTHENTICATED error, similar to what we're going to do next.
Now, to add authorization, update the TasksDataSource class with the following:
First, add the following helper method whose purpose is to throw an error of type GraphQLError (from the graphql package) whenever a user is not authenticated. In this case, this would happen when the authorization header is not provided (this is what I meant about being vulnerable):
private throwUnauthenticatedUserError(): GraphQLError {
  throw new GraphQLError('Authentication key was not found', {
    extensions: { code: 'UNAUTHENTICATED', httpStatus: 401 },
  });
}
Then, update every data source method by doing something like this: Inside the createTask method, add a new parameter called authenticationToken:
async createTask(
    taskInput: TaskInput,
    authorEmail: string,
    authenticationToken: string,
  ): Promise<TaskMutationResponse> {
    // ...
  }
Next, add the following if statement on the top of the function body, before anything else:
async createTask(
    taskInput: TaskInput,
    authorEmail: string,
    authenticationToken: string,
  ): Promise<TaskMutationResponse> {
    if (!authenticationToken) {
      this.throwUnauthenticatedUserError();
    }

    // ...
}
Normally, in this step, you would check your database to see if there's a user whose API token is the provided authenticationToken. And, it is also the one that is always recommended to be kept private no matter what. Then, if no user is found with that API token, this authenticated user error is thrown.
Now, add the same validation to the rest of the methods: editTaskBody, editTaskStatus, and deleteTask.
After that, we need to update the resolvers function by passing in the authenticationToken from the context object, like this:
export const resolvers: Resolvers = {
  // ...
  Mutation: {
    createTask: async (
      _parent,
      { authorEmail, task },
      { dataSources, authorizationToken }
    ) => {
      const createdTask = await dataSources.tasks.createTask(
        task,
        authorEmail,
        authorizationToken
      );

      return createdTask;
    },
    // ...
  },
};
We get the authorization token from the context parameter ({ dataSources, authorizationToken }), and we pass it to the createTask method as the last argument. Now do the same with the other mutation resolvers.
With this, if we now build our app, then run the server locally, and test the resolvers without providing an Authorization header, the UNAUTHENTICATED error should be thrown:

This is the response the client should get when an error was thrown. Basically, the response includes an errors array that contains each error that occurred. Each error object has an extensions field that details additional information that can be useful. In this case, it includes an error code, a httpStatus and a stacktrace.
The code and httpStatus are the fields we specified in our helper method inside the TasksDataSource class:
private throwUnauthenticatedUserError(): GraphQLError {
    throw new GraphQLError('Authentication key was not found', {
      extensions: { code: 'UNAUTHENTICATED', httpStatus: 401 },
    });
 }
Also, FYI, the stackTrace array is only included in development mode. On production, it is not. So, don't worry about that 😉.
Alright! We have successfully implemented authentication and authorization in our app (implementation not recommended tho, but now you know how to do so in a better way 👏).
Securing the GraphQL API
When building an API, it is always important to watch out for any weird operation that might damage our server or for any malicious users trying to execute bad stuff. Due to this, there are several ways you can protect your API from any malicious query. Some of the most known methods are rate limiting, depth limiting, and amount limiting.
In our case, we will only implement depth limiting, which helps prevent too large queries that could lead to overfetching or DOS attacks.
Imagine someone tries to execute this large query:
query ExampleDeepQuery($authorEmail: String!) {
  tasks(authorEmail: $authorEmail) {
    author {
      email
      name
      tasks {
        author {
          email
          name
          tasks {
            author {
              tasks
            }
          }
        }
      }
    }
  }
}
This example query can become deeper and deeper which can cause negative effects to the API. To prevent operations like these, there are many tools that help solve this issue. In this case, a popular package is graphql-depth-limit, you can install it like this:
yarn add graphql-depth-limit @types/graphql-depth-limit -D
Then, in the src/index.ts file, add this import:
import depthLimit from 'graphql-depth-limit';
And, add the validationRules field to the Apollo Server options object, like this:
const server = new ApolloServer<ContextValue>({
  typeDefs,
  resolvers,
  validationRules: [depthLimit(2)],
});
depthLimit is a function that accepts 3 parameters: maxDepth being the maximum allowed depth for any operation (it can be any number, just choose the one that meets your needs), an options object, and a callback function.
Now, if someone tries to execute a query similar to the one from above, they should get an error like this:
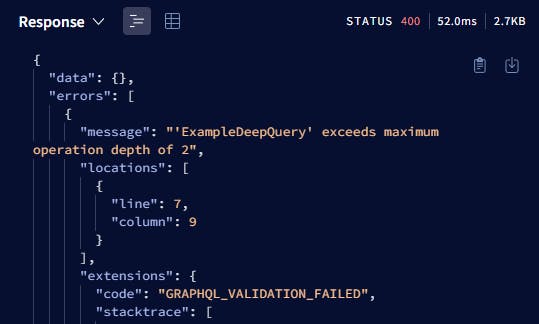
To learn more about how you can secure your GraphQL API, make sure to read the Securing Your GraphQL API from Malicious Queries article from the Apollo GraphQL's blog.
Deploying the backend 🚀
You can deploy this wherever you're more comfortable. But, as for this article's flow, we're going to use Render with its free plan (no credit card required FYI):
Once you've signed in, go to the Dashboard.
Click on "New +", then on "Web Service".

Once on the Web Service section, click on "Configure account" under GitHub to connect a repository from your GitHub account.
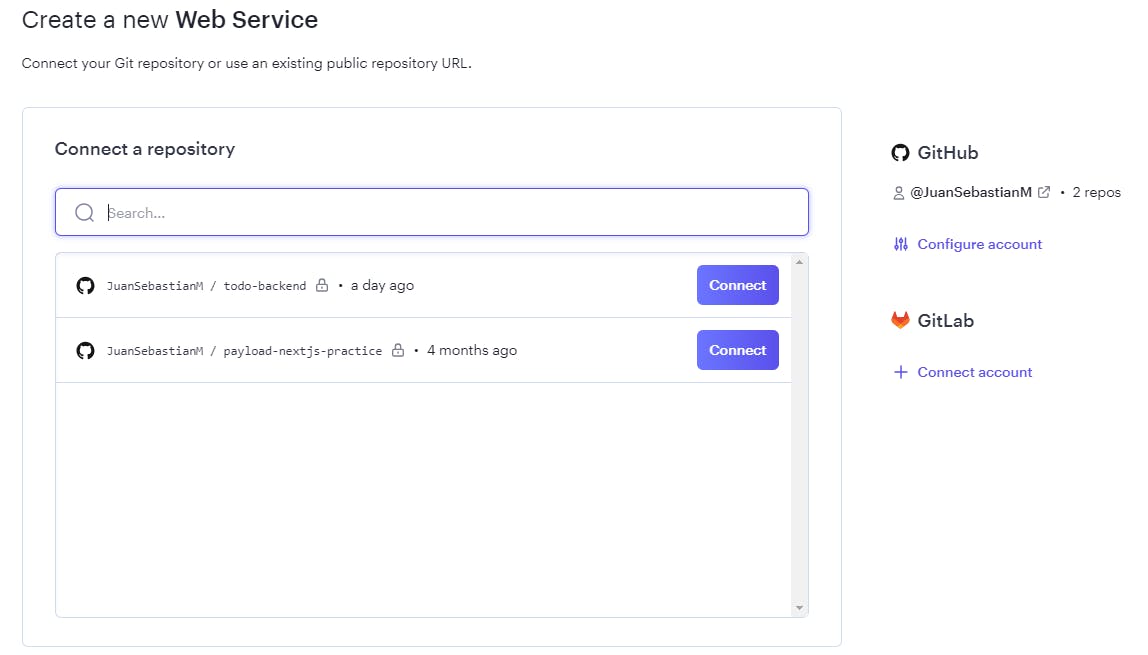
After that, follow the steps you're given. When you're prompted if you want to connect all of your repos or only a specific one, select the option to pick a specific repo.
Once you've successfully connected a repository, you'll be sent to a section where you have to configure environment variables, commands, and all of the other info related to your web service:

Name: the name of your web service.
Branch: the branch that will be used as the source of your Web Service.
Root directory: in our case, it should besrc.
Build command: command to install packages. In this case,yarn install.
Start command: command(s) to start the server:yarn run build && yarn run start.
Auto-Deploy: ifyes, every time you push changes to the branch you specified in the Branch field, Render will automatically deploy the app.On "Instance Type", leave the default option which is "Free". As per the Free Instance Types docs, Web Services on the free instance type are automatically spun down after 15 minutes of inactivity. When a new request for a free service comes in, Render spins it up again so it can process the request.
Now, to configure the environment variables, click on "Advanced", then on "Add Environment Variable". Here, we have to add the
MONGODB_URIvariable with its value. Also, for your GraphQL server to run in production mode, you have to set theNODE_ENVvariable toproduction. However, Render already does this for you 😉.Finally, click on the "Create Web Service" button.
At this point, a deployment will be triggered and you will be able to see the logs in real-time.
The production link is the one under your Web Service name. That's the one we will use when fetching data 👀🎉.
Building the frontend 💻
Creating a Next.js app
Use the following command:
npx create-next-app@latest insert-your-project-name --typescript --eslint
Considering this article's publishing date, July 2023, this command will help you create an app with version 13. So, this is the config we will use:
Since Tailwind CSS is not within the main focus as mentioned earlier, it's up to you to select yes/no when prompted if you would like to use it with the project. In this article, we are going to use it.
Whether you would like to use the
src/directory with this project or not is totally up to you, as well. In this article, we will not use it.We are going to use the new App Router, so select yes.
Customizing the default import alias? Optional, too. But, we are going to use it here with its default configuration (
@/).
Basic cleanup and setup
Remove everything from
app/globals.css, but leave these Tailwind configs:@tailwind base; @tailwind components; @tailwind utilities;As Next.js 13.2 introduced Route Handlers, we're going to create a new folder called
apiwhere we will have all API routes and it will live under theappdirectory.
Setting up authentication with NextAuth
First, install NextAuth.js
npm install next-authCreate a new subfolder inside
app/apicalledauth, which will include a dynamic route handler called[...nextauth]. Finally, add aroute.tsfile to let the App Router know that this is a Route Handler.
Here,
[...nextauth]will contain all of the NextAuth configurations.Inside
route.ts, we have to add a NextAuth handler that will accept an authentication configuration object as an argument. This config object must be exported because we'll need it later in case we need to fetch data inside a server component. Also, it needs to be created in a separate file (you'll see why in a while). The code for this would be:import NextAuth from 'next-auth'; const handler = NextAuth(/* here goes the auth config */); export { handler as GET, handler as POST };You might wonder why we can't just create the auth config object right in this same file. Something like this:
import NextAuth from 'next-auth'; const authOptions = { // ... } const handler = NextAuth(authOptions); export { handler as GET, handler as POST };The reason is that if you declare a variable different than the
handler, you'll likely run into an error when creating a production build withnpm run build. The error might look like this:Type error: Type 'OmitWithTag<typeof import("your-app-route/app/api/auth/[...nextauth]/route"), "GET" | "POST" | "HEAD" | "OPTIONS" | "PUT" | "DELETE" | "PATCH" | "config" | ... 6 more ... | "runtime", "">' does not satisfy the constraint '{ [x: string]: never; }'. Property 'authOptions' is incompatible with index signature. Type 'AuthOptions' is not assignable to type 'never'.So, to avoid that, create a file called
authOptions.tsin the root of the project. There, we'll add our configuration and will specify the authentication provider(s) we will use in our app. In our case, it'll be GitHub.import type { AuthOptions } from 'next-auth'; import GitHubProvider from 'next-auth/providers/github'; export const authOptions: AuthOptions = { providers: [ GitHubProvider({ clientId: process.env.GITHUB_ID ?? '', clientSecret: process.env.GITHUB_SECRET ?? '', }), ], };After that, we can import this variable into the
route.tsfile and use it as the argument to theNextAuthcall. That file should end up like this:import { authOptions } from '@/authOptions'; import NextAuth from 'next-auth'; const handler = NextAuth(authOptions); export { handler as GET, handler as POST };Now, to get the value of the
GITHUB_IDand theGITHUB_SECRETenvironment variables, we'll need to create a GitHub app. For this, go to https://github.com/settings/apps and click on "New GitHub app".
Once on the registration page, you'll be required to fill out a form.
On "GitHub App name", type the name of your GitHub App. It must be a unique name.
On "Homepage URL", set it equal to
http://localhost:3000until we push to production and get a production URL. This means we'll need to swap out the localhost URL with the production URL once we have it. Otherwise, our authentication flow won't work on production.Under "Callback URL", type
http://localhost:3000/api/auth/callback/github. As mentioned in the previous step, we'll swaphttp://localhost:3000with the prod URL.Before creating the app, under "Webhook", untick the "Active" option if it is selected. The other fields can remain with their default values.
Finally, click on "Create GitHub app".
After you've successfully created the app, you'll be redirected to the settings page where you'll be able to get the client ID (
GITHUB_ID) and client secret (GITHUB_SECRET)keys for your NextAuth configuration.Client ID:
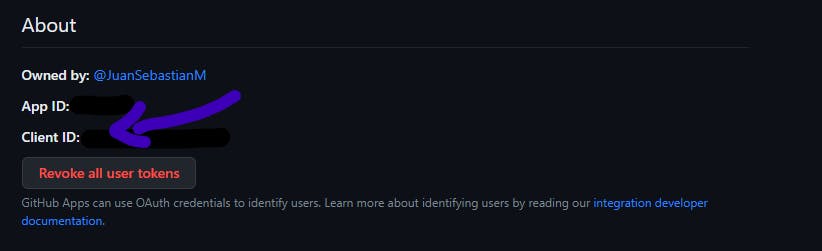
Client secret:

If you still haven't done it, create a new
.envfile in the root of your repository and addGITHUB_IDandGITHUB_SECRETwith their respective values, along with 2 other NextAuth-related variables that are optional during development but you can get warnings (which can be ignored) if you don't set them up. These 2 variables are:NEXTAUTH_URLwhich will behttp://localhost:3000during development mode and on production, it should be the canonical URL of your site.NEXTAUTH_SECRETwhich should be sort of a unique key used to encrypt the NextAuth.js JWT, and to hash email verification tokens. You can useopenssl rand -base64 32in any terminal or generate-secret.vercel.app/32 to generate a random value.NOTE: don't forget to add the
.envfile to.gitignore, so you don't expose secret values.
After this, we need to wrap our entire app with a
<SessionProvider>component, so that we can then get user data everywhere with theuseSessionhook from NextAuth.For this, and given the fact that we are using App Router from Next.js 13, we have to create a client component that returns the
<SessionProvider>component as a wrapper of child components that are expected to be passed through props.- Why a Client Component? Well, because
SessionProvideruses React Context under the hood; and, this is a use case for Client Components as mentioned in the When to use Server and Client Components? section explained by the Next.js team.
- Why a Client Component? Well, because
So, let's first create a new folder called
componentsunder theappdirectory that will store our client component file calledAuthProvider.tsx.The code would look like this:
'use client'; import { Session } from 'next-auth'; import { SessionProvider } from 'next-auth/react'; interface AuthProviderProps { session: Session | null; children: React.ReactNode; } const AuthProvider = ({ session, children }: AuthProviderProps) => { return <SessionProvider session={session}>{children}</SessionProvider>; }; export default AuthProvider;Here, we add the
'use client'directive at the very top of our file to let our app know that this is a client component. If that directive is not included, 1 out of 2 things can happen:The component will be considered a server component by default, as all components within the
appdirectory are server components unless specified otherwise.If your component is a use case for Client Components, you'll get an error like this:

Also, we accept a
sessionobject of typeSessionornullfromnext-authand pass it as value to theSessionProvider's session prop. This way, we fetch the session server-side (from ourlayout.tsxcomponent) and provide it to the session context provider to avoid re-fetching it on every future component and making them behave incorrectly.
Next, let's import the new
AuthProvidercomponent intolayout.tsxand wrap everything inside thebodywith it.The code would look like this:
import AuthProvider from '@/app/components/AuthProvider'; // ... export default function RootLayout({ children, }: { children: React.ReactNode; }) { return ( <html lang="en"> <body className={inter.className}> <AuthProvider> <main>{children}</main> </AuthProvider> </body> </html> ); }At this point, we're still missing the session fetching part. So, let's first turn the
RootLayoutfunction intoasync, so that we can useawaitlater.export default async function RootLayout({ children, }) { // ... }Then import
getServerSessionandSession(to type thesessionvariable) fromnext-auth. After that, wrap thegetServerSessionmethod inside atry-catchstatement as we're dealing with aPromise. Finally, save the result from that call in the newsessionvariable and pass it through thesessionprop from theAuthProvidercomponent.Your code should now look this:
import AuthProvider from '@/app/components/AuthProvider'; import { authOptions } from '@/authOptions'; import { Metadata } from 'next'; import { Session, getServerSession } from 'next-auth'; import { Inter } from 'next/font/google'; import './globals.css'; const inter = Inter({ subsets: ['latin'] }); export const metadata: Metadata = { title: 'To-do App', description: 'A simple to-do app built with Next.js, TypeScript, GraphQL, MongoDB, and NextAuth.', }; export default async function RootLayout({ children, }: { children: React.ReactNode; }) { let session: Session | null; try { session = await getServerSession(authOptions); } catch { session = null; } return ( <html lang="en"> <body className={inter.className}> <AuthProvider session={session}> <main>{children}</main> </AuthProvider> </body> </html> ); }One thing I haven't mentioned yet but you might have already noticed is that we pass the
authOptionsvariable as an argument to thegetServerSessionmethod. That's the NextAuth configuration we created and exported from theauthOptions.tsfile.After this, we're now ready to implement our sign-in/sign-out functionalities 💪.
Let's update our homepage (
app/page.tsx) by adding the following:Some basic introduction content for future users. Use the following code for that:
export default function HomePage() { return ( <section className="min-h-screen px-8 flex flex-col justify-center items-center"> <header className="text-center"> <h1 className="font-bold text-5xl"> Organize your life in a matter of seconds! </h1> </header> </section> ); }Two Call To Action buttons after the
headerelement:The "Sign in with GitHub" one, which will be visible for logged-out users and will, obviously, redirect to the sign-in page.
A "Check your to-dos" button that will be visible for logged-in users and will redirect them to a
/todospage that we will create later.
A basic header component where a "Log Out" button and the app's logo will live. The Log Out button should only be visible to authenticated users.
To add the logic to check whether a user is signed in or not, let's first create a separate client component called HomeCtaButton.tsx inside our components folder. This way we don't make the whole homepage component a client one and our app's performance remains in a good state 😉.
Once in our new client component, import the useSession hook from next-auth/react. Oh, and don't forget the 'use client' directive on the top.
'use client';
import { useSession } from 'next-auth/react';
Then, before the return inside the component, call that hook and save the coming status property in a variable. status can be "authenticated", "loading" or "unauthenticated".
const HomeCtaButton = () => {
const { status } = useSession();
return (
// ...
);
};
export default HomeCtaButton;
Now, in order to render the two CTA buttons based on the user's status, we do it like this:
const HomeCtaButton = () => {
const { status } = useSession();
if (status === 'authenticated') {
return (
// button for authenticated users only
}
return (
// button for unauthenticated users only
);
};
Next, for us to add the sign-in functionality, let's import signIn from next-auth/react. We would now have this:
import { signIn, useSession } from 'next-auth/react';
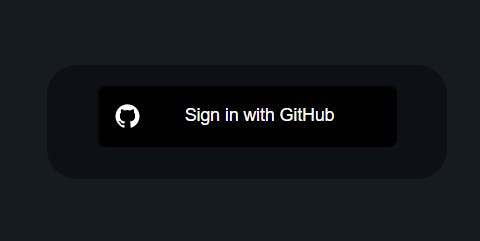
Then, this method should be called when the user clicks on the "Sign in with GitHub" button. Something like this:
const HomeCtaButton = () => {
// ...
return (
<button
onClick={() => signIn()}
type="button"
className="block bg-black border border-black text-white py-2 px-8 rounded-full hover:bg-white hover:text-black transition-all"
>
Sign in with GitHub
</button>
);
};
But that's not all! Currently, what this button does is that it redirects the users to the sign-in page where they can choose which authentication provider to use:
This flow is not the one we want our users to experience because then why would we have a button saying "Sign in with GitHub" on our homepage?
To fix this, we can add some configuration arguments to the signIn method:
The first argument is a provider's ID. In this case, as we are using GitHub as the provider, we can pass
github.In case you still didn't know, once the user successfully signs in, they will be redirected back to the page the sign-in flow was initiated from unless a different URL is specified manually. So, if we want to redirect the users to the
/todospage once they sign in, we can pass an object as a second argument. Inside this object, we should include thecallbackUrlproperty, whose value should be the path to the target page.
The code for the "Sign in with GitHub" CTA button will now look like this:
<button
onClick={() => signIn('github', { callbackUrl: '/todos' })}
type="button"
className="block bg-black border border-black text-white py-2 px-8 rounded-full hover:bg-white hover:text-black transition-all"
>
Sign in with GitHub
</button>
Now, when the users click on this button, they will be redirected to GitHub immediately where they'll be asked to authorize the GitHub app that was created in the 5th step from this section 👏.
After this, we add the "Check your to-dos" CTA button inside the if statement by using the <Link> component from next/link.
import Link from 'next/link';
const HomeCtaButton = () => {
// ...
if (status === 'authenticated') {
return (
<Link
href="/todos"
className="block bg-black border border-black text-white py-2 px-8 rounded-full hover:bg-white hover:text-black transition-all"
>
Check your to-dos
</Link>
);
}
So, our entire HomeCtaButton component should now look like this:
'use client';
import { signIn, useSession } from 'next-auth/react';
import Link from 'next/link';
const HomeCtaButton = () => {
const { status } = useSession();
if (status === 'authenticated') {
return (
<Link
href="/todos"
className="block bg-white text-black py-2 px-8 rounded-full"
>
Check your to-dos
</Link>
);
}
return (
<button
onClick={() => signIn('github', { callbackUrl: '/todos' })}
type="button"
className="block bg-black text-white py-2 px-8 rounded-full"
>
Sign in with GitHub
</button>
);
};
export default HomeCtaButton;
And, our homepage component (app/page.tsx) should now look like this:
import HomeCtaButton from '@/app/components/HomeCtaButton';
export default function HomePage() {
return (
<section className="min-h-screen px-8 flex flex-col justify-center items-center">
<header className="text-center">
<h1 className="font-bold text-5xl">
Organize your life in a matter of seconds!
</h1>
</header>
<div className="my-12">
<HomeCtaButton />
</div>
</section>
);
}
As you can see, we have a Server Component in which there's a Client Component called HomeCtaButton whose code should look like this:
With this, we now have authentication with NextAuth working in our app 💪.
EXTRA: Do you see how, in our HomeCtaButton component, we're repeating the same Tailwind utility classes in the two buttons?
Well, we can fix this by creating a custom class in our globals.css with Tailwind's @layer directive. This way, we can have a reusable class to avoid flooding our components with the same utility classes.
For this, let's add this piece of code there:
@layer components {
.btn-primary {
@apply block bg-black border border-black text-white py-2 px-8 rounded-full hover:bg-white hover:text-black transition-all;
}
}
Now, we can use btn-primary in our CTA buttons and make it look cleaner 😊
// ...
const HomeCtaButton = () => {
// ...
if (status === 'authenticated') {
return (
<Link href="/todos" className="btn-primary">
Check your to-dos
</Link>
);
}
return (
<button
onClick={() => signIn('github', { callbackUrl: '/todos' })}
type="button"
className="btn-primary"
>
Sign in with GitHub
</button>
);
};
This is all for the sign-in functionality, but we're still missing the sign-out one 🤔.
Therefore, let's now create a server component in the components folder and name it GlobalHeader.tsx.
import Link from 'next/link';
const GlobalHeader = () => {
return (
<header className="fixed bg-white py-4 px-8 w-full flex justify-between items-center">
<h1>
<Link
href="/"
className="font-bold text-xl"
>
To-do List App
</Link>
</h1>
</header>
);
};
export default GlobalHeader;
Now, let's create a client component which is going to be the button. And, it should be a client one because we'll add interactivity to it. We'll name it LogOut.tsx.
'use client';
import { signOut } from 'next-auth/react';
const LogOut = () => {
return (
<button
type="button"
className="btn-primary"
onClick={() => signOut()}
>
Log out
</button>
);
};
export default LogOut;
Here, we call the signOut method from next-auth/react when the button is clicked.
After creating the LogOut component, we have to use it inside GlobalHeader we created in the previous step and add it after the h1.
import LogOut from '@/app/components/LogOut';
import Link from 'next/link';
const GlobalHeader = () => {
return (
<header className="fixed bg-white py-4 px-8 w-full flex justify-between items-center">
<h1>
<Link
href="/"
className="font-bold text-xl"
>
To-do List App
</Link>
</h1>
<LogOut />
</header>
);
};
export default GlobalHeader;
After this, we now have to import this GlobalHeader component into the root layout, so that all of our pages include it.
import GlobalHeader from '@/app/components/GlobalHeader';
// ...
export default async function RootLayout({
children,
}: {
children: React.ReactNode;
}) {
// ...
return (
<html lang="en">
<body className={inter.className}>
<AuthProvider session={session}>
<GlobalHeader />
<main>{children}</main>
</AuthProvider>
</body>
</html>
);
}
After this, the sign-out functionality should be working 🔥. But, you should know that its default behavior is to redirect the users to the sign-in page IF they sign out from a page accessible only by authenticated users.
If you want to change this behavior and, for example, make it so users who log out are sent to the homepage (or any other specific page), you can do something similar to what we did with the signIn method.
Let's go back to the LogOut.tsx component and let's pass an object as an argument to the signOut method. Inside this object, we'll pass a callbackUrl property, whose value should be the path to the target page. In this case, as we want to redirect the users to the homepage, we should set "/" as its value.
<button
type="button"
className="btn-primary"
onClick={() => signOut({callbackUrl: "/"})}
>
Log out
</button>
If we test this now, we'll notice that now the new behavior is to redirect the user to the path we specify as the callbackUrl.
However, there's something you might not want your users to experience and it's the fact that every time they log out, the page reloads 👀.
If you really want to avoid this, then let's see how it is done:
Inside our LogOut.tsx component, move the signOut call to an async handleClick function before the return: and use await. Also, include redirect: false to specify we do not want the page to reload.
const handleClick = async () => {
const data = await signOut({
redirect: false,
callbackUrl: '/',
});
};
Now, data will end up being an object with a url property. We are going to use that URL with the useRouter hook's push method from next/navigation:
//...
import { useRouter } from 'next/navigation';
const LogOut = () => {
const router = useRouter();
const handleClick = async () => {
const data = await signOut({
redirect: false,
callbackUrl: '/',
});
router.push(data.url);
};
return (
// ...
);
};
After this, just pass the handleClick function through the onClick from the Log Out button:
// ...
const LogOut = () => {
// ...
const handleClick = async () => {
// ...
};
return (
<button
type="button"
className="btn-primary"
onClick={handleClick}
>
Log out
</button>
);
};
Finally, for us to hide this button from unauthenticated users, we can use the useSession hook, save the status value in a variable and check if it is equal to unauthenticated. If so, return null.
// ...
const LogOut = () => {
// ...
const { status } = useSession();
// ...
if (status === 'unauthenticated') return null;
return (
// ...
);
};
export default LogOut;
With this, the LogOut component will end up like this:
'use client';
import {
signOut,
useSession,
} from 'next-auth/react';
import { useRouter } from 'next/navigation';
const LogOut = () => {
const router = useRouter();
const { status } = useSession();
const handleClick = async () => {
const data = await signOut({
redirect: false,
callbackUrl: '/',
});
router.push(data.url);
};
if (status === 'unauthenticated') return null;
return (
<button
type="button"
className="btn-primary"
onClick={handleClick}
>
Log out
</button>
);
};
export default LogOut;
Now, we're finally done with setting up authentication 🤯.
For more in-depth info about adding authentication with NextAuth, visit their documentation page.
Creating the /todos page
There are two important factors to take into account:
This page will only be available for authenticated users.
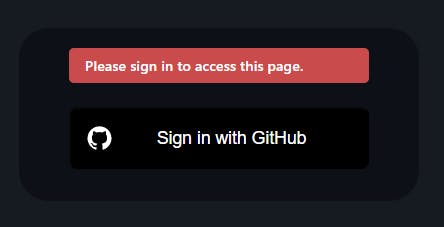
If an unauthenticated user tries to go to
/todos, they will be redirected to the sign-in page; and... yes, once they sign in, they should be redirected back to this page.
Let's begin by creating a new folder under the app directory called todos to denote that it's a route and a page.tsx component inside. Its full path should be app/todos/page.tsx.

Inside, let's add this basic code before we move on to creating our to-do item components.
import { Metadata } from 'next';
export const metadata: Metadata = {
title: 'Your To-dos',
};
export default function TodosPage() {
return (
<section>
<header>
<h1>Hey, user 👋! These are all of your to-dos:</h1>
</header>
</section>
);
}
Now, let's add the functionality to forbid access to this page to unauthenticated users. We can do this in two ways:
By passing
{ required: true }as an argument to theuseSessionhook in case this was a client component.'use client'; import { useSession } from "next-auth/react"; // ... export default function TodosPage() { const { data: session } = useSession({ required: true }); return ( // ... ); }The issue with this approach is that if you added the functionality to avoid page reloading every time a user logs out, the flow of redirecting to the page you specify won't work as it should. Instead, it will redirect them to the sign-in page.
The workaround for the issue mentioned above and the approach we will take from now on (also because this is a server component):
Create a file called
middleware.tsin the root of your repository (at the same level aspackage.json).Add this code:
export { default } from 'next-auth/middleware'; export const config = { matcher: ['/todos'] };Every path inside the
matcherarray will be included in the list of pages that are only accessible by authenticated users.
Find more info about the middleware pattern at the NextAuth's Next.js Middleware documentation.
Having secured our page, let's now add authentication validation to display the user's name instead of "user" in "Hey, user 👏!". Use the following code:
// ...
import { getSession } from "@/utils/get-session";
// ...
export default async function TodosPage() {
const session = await getSession();
const user = session?.user;
return (
<section className="min-h-screen px-8 pt-20">
<header>
<h1>
Hey, {user?.name ?? 'user'} 👋!
These are all of your to-dos:
</h1>
</header>
</section>
);
}
Here, we first call
getSessionfrom@/utils/get-session, which is a function that contains the logic to get a session from the server (the same logic we used in theRootLayoutcomponent). So, create autilsfolder in the root of the project and add aget-session.tsfile with this code:import { authOptions } from "@/authOptions"; import { getServerSession } from "next-auth"; export const getSession = async () => { try { const session = await getServerSession(authOptions); return session; } catch { return null; } }Then, replace the code from
RootLayoutwith this function:export default async function RootLayout({ children, }: { children: React.ReactNode; }) { const session = await getSession(); return ( // ... ); }After that, if there's a
session, the user's name is displayed. If not, "user" is displayed. The falsy case should never happen because for this page to be accessible, there should be a session. That means a user must be authenticated.
With this, every user should now see their name there. Nice, uh?!

Next, let's get our hands dirty with fetching the data by using GraphQL before diving into the UI building💪.
Fetching data with Apollo Client
First, install @apollo/experimental-nextjs-app-support and @apollo/client@alpha (to install Apollo Client 3.8, because @apollo/experimental-nextjs-app-support depends on that version).
npm install @apollo/client@alpha @apollo/experimental-nextjs-app-support
After that, create a new lib folder in the root of the project in which we'll add the Apollo Client setup. Once created, add a new file called apolloClient.ts and use this code:
import {
ApolloClient,
HttpLink,
InMemoryCache,
} from '@apollo/client';
import { registerApolloClient } from '@apollo/experimental-nextjs-app-support/rsc';
export const { getClient } = registerApolloClient(() => {
return new ApolloClient({
cache: new InMemoryCache(),
link: new HttpLink({
uri: process.env.NEXT_PUBLIC_GRAPHQL_URI,
fetchOptions: {
next: { revalidate: 0 },
},
headers: {
authorization: "Bearer 123",
}
}),
});
});
Here, we use
registerApolloClientfrom the experimental package and it returns agetClientmethod that we can then use in our Server Components.In the configuration object from
new ApolloClient:cacheis an instance ofInMemoryCache, which Apollo Client uses to cache query results after fetching them,uriis the URL of our GraphQL server (the one we got after deploying our backend on Render) and it needs to be an absolute URL, as relative URLs cannot be used in SSR.fetchOptionsis an object that lets you add options to use in every call tofetch. In this case,next: { revalidate: 0 }is an option that tells Next.js to always revalidate our requests.headersis an object where you can add the fetch headers. We addedauthorizationto specify an authentication token, which in this case is a fake one so that we can bypass authentication. As mentioned earlier, this token would normally be a secret API key. If for some reason you don't want to add this header globally, you can add them later when using the functions to run queries/mutations.
Now, add the new NEXT_PUBLIC_GRAPHQL_URI environment variable to the .env file with its respective value :)
Next, for us to be able to use the client in our Client Components, we need to wrap our entire app with an ApolloNextAppProvider from the experimental package. For this, let's create a client component named ApolloClientProvider.tsx. There, we'll add this code:
'use client';
import {
ApolloClient,
ApolloLink,
HttpLink,
SuspenseCache,
} from '@apollo/client';
import {
ApolloNextAppProvider,
NextSSRInMemoryCache,
SSRMultipartLink,
} from '@apollo/experimental-nextjs-app-support/ssr';
function makeClient() {
const httpLink = new HttpLink({
uri: process.env.NEXT_PUBLIC_GRAPHQL_URI,
fetchOptions: {
next: { revalidate: 0 },
},
headers: {
authorization: "Bearer 123",
}
});
return new ApolloClient({
cache: new NextSSRInMemoryCache(),
link:
typeof window === 'undefined'
? ApolloLink.from([
new SSRMultipartLink({
stripDefer: true,
}),
httpLink,
])
: httpLink,
});
}
function makeSuspenseCache() {
return new SuspenseCache();
}
export function ApolloClientProvider({
children,
}: React.PropsWithChildren) {
return (
<ApolloNextAppProvider
makeClient={makeClient}
makeSuspenseCache={makeSuspenseCache}
>
{children}
</ApolloNextAppProvider>
);
}
Finally, let's go to our root layout (layout.tsx) to wrap our app. That component will end up looking like this:
// ...
import { ApolloClientProvider } from '@/app/components/ApolloClientProvider';
// ...
export default async function RootLayout({
children,
}: {
children: React.ReactNode;
}) {
// ...
return (
<html lang="en">
<body className={inter.className}>
<AuthProvider session={session}>
<ApolloClientProvider>
<GlobalHeader />
<main>{children}</main>
</ApolloClientProvider>
</AuthProvider>
</body>
</html>
);
}
With this, we're now ready to use the Apollo Client hooks in our client components and its methods in the server components👏.
To do so, create a constants.ts file inside the utils folder that will host all of the reusable constants that we'll use throughout our components.
There, let's add our first GraphQL query - for now:
import { gql } from '@apollo/client';
export const GET_ALL_TASKS = gql`
query GetTasksByAuthorEmail($authorEmail: String!) {
tasks(authorEmail: $authorEmail) {
authorEmail
id
title
description
done
createdAt
updatedAt
}
}
`;
Now, let's go back to our To-dos page component (app/todos/page.tsx) and call the getClient function from the apolloClient file that was created before. Then await the call to the query method and pass the GET_ALL_TASKS variable from above as the value of the query property from the arguments list, like this:
import { getClient } from "@/lib/apolloClient";
import { GET_ALL_TASKS } from "@/utils/constants";
//...
export default async function TodosPage() {
// ...
const graphqlClient = getClient();
const { data } = await graphqlClient.query({query: GET_ALL_TASKS});
return (
// ...
);
}
One issue you might face is that data will be typed as unknown, so you won't be allowed to map through it to render each to-do component. To fix this, let's add type safety by installing the following packages (similar to what we did in the backend repo).
npm install -D ts-node @graphql-codegen/cli @graphql-codegen/client-preset
Then, run this command:
npx graphql-code-generator init
And copy these answers:
$ npx graphql-code-generator init
Welcome to GraphQL Code Generator!
Answer few questions and we will setup everything for you.
? What type of application are you building? Application built with React
? Where is your schema?: (path or url) # this is your GraphQL API
? Where are your operations and fragments?: graphql/**/*.graphql
? Where to write the output: gql/
? Do you want to generate an introspection file? No
? How to name the config file? codegen.ts
? What script in package.json should run the codegen? generate
After this, you'll have a codegen.ts file created and now we can create a GetAllTasks.graphql file inside a new directory called graphql. Then, we'll move the GetAllTasks query we created in the constants.ts to this new file.
query GetTasksByAuthorEmail($authorEmail: String!) {
tasks(authorEmail: $authorEmail) {
authorEmail
id
title
description
done
createdAt
updatedAt
}
}
Now, if we run npm run generate, we'll see a new gql folder created, like this:
In case you actually get an error like the following because you set your production GraphQL API URL as the schema:
> graphql-codegen --config codegen.ts
✔ Parse Configuration
⚠ Generate outputs
❯ Generate to gql/
✖
Failed to load schema from <insert GraphQL API URL>:
GraphQL introspection is not allowed by Apollo Server, but the query contained __schema or __type. To enable intr…
◼ Load GraphQL documents
◼ Generate
You can do one of the following options:
enable introspection on production right from the
new ApolloServercall in the backend repo, like this:const server = new ApolloServer<BaseContext>({ // ... introspection: true });start your backend server locally. Then, in the frontend repo, set
http://localhost:4000(the localhost URL of the backend server) as the value of theschemafield from thecodegen.tsfile. Finally, runnpm run generate. With this, you'll be able to generate your GraphQL types successfully.
In our case, we'll choose the 2nd alternative. The codegen.ts file should end up like this:
import type { CodegenConfig } from '@graphql-codegen/cli';
const config: CodegenConfig = {
overwrite: true,
schema: 'http://localhost:4000/',
documents: 'graphql/**/*.graphql',
generates: {
'gql/': {
preset: 'client',
plugins: [],
},
},
};
export default config;
After this, we should now have our gql folder created. Now, we can use those types in our future queries 👏.
To do so, we're going to add the following code out of the TodosPage component at app/todos/page.tsx:
const GetAllTasksByAuthorQuery = graphql(``);
Here, we use graphql from @/gql, which is a function that was generated by codegen and it allows you to parse GraphQL queries into a typed document that you can then use anywhere.
Now, if we hit CTRL/CMD + space bar inside the backticks (``) for auto-completion, we'll see that we can use the GetAllTasks query we created before inside graphql/GetAllTasks.graphql. So, let's use it.
const GetAllTasksByAuthorQuery = graphql(`query GetTasksByAuthorEmail($authorEmail: String!) {
tasks(authorEmail: $authorEmail) {
authorEmail
id
title
description
done
createdAt
updatedAt
}
}`);
Now, if we hover over the variable name (GetAllTasksQuery), we can see that we have a typed document:

That's awesome, isn't it? 🥳
unknown as the type, it is because you're likely formatting your query inside the backticks in a way that doesn't match the expected formatting. So, avoid that and try to match the exact string formatting as the one that is suggested in the autocomplete.After that, pass this variable as the argument to the query method from the GraphQL client:
export default async function TodosPage() {
const session = await getSession();
const user = session?.user;
const { data } = await graphqlClient.query({
query: GetAllTasksByAuthorQuery,
variables: {
authorEmail: user?.email ?? '',
}
});
return (
// ...
);
}
Also, we passed in a variables property in which there is the authorEmail variable that is needed in this query. Its value is the email prop from session?.user.
Now, the type of data is now GetTasksByAuthorEmailQuery, which we can find at gql/graphql.ts 💪.
With this, we should now be able to map through the data without any issues.
Next, we'll create a custom to-do component where we'll tackle the functionalities related to the to-dos (create, edit, delete).
Creating our to-dos related components
First, add three new components inside the components folder: Todo.tsx (which will contain all the details), TodoFormButtons.tsx (which will contain the buttons to be rendered in the create/edit forms) and TodoReadingButtons.tsx (which will contain the buttons inside a Todo item). As for the two latter, you will understand their behavior once they are created.
Let's deal with Todo.tsx for now. Inside, add the following code:
import { Task } from "@/gql/graphql";
const Todo = ({ title, description }: Task) => {
return (
<article className="flex flex-col lg:flex-row items-center border border-black rounded-2xl max-w-xl w-full pb-4 lg:pb-0">
<div className="flex flex-col items-center basis-1/2">
<header className="p-4 text-center">
<h2>{title}</h2>
</header>
<hr className="w-full" />
<p className="p-4 text-center">
{description || 'No description'}
</p>
</div>
</article>
);
};
export default Todo;
As the description field is optional when adding a to-do, we render "No description" in case it is not provided. We also use the Task type from @/gql/graphql for the props 😉.
Now, before adding the code for the TodoFormButtons.tsx and the TodoReadingButtons.tsx components, let's first update the constants.ts file from the utils folder with the following:
export enum TodoModeEnum {
EDITING = 'editing',
READING = 'reading',
CREATING = 'creating',
}
interface TodoButtonTypes {
success: string;
danger?: string;
}
export const TODO_MODE_BUTTONS: Record<
TodoModeEnum,
TodoButtonTypes
> = {
[TodoModeEnum.CREATING]: {
success: 'Create',
},
[TodoModeEnum.EDITING]: {
success: 'Save',
danger: 'Cancel',
},
[TodoModeEnum.READING]: {
success: 'Edit',
danger: 'Delete',
},
};
TodoModeEnum is a TypeScript enum that will be used to check whether a user is reading, editing, or creating a to-do. Depending on the value, we will display a pair of buttons labeled "success" and "danger".
The buttons whose type is "success" will be either "Create", "Save", or "Edit". And, the buttons whose type is "danger" will be either "Cancel", or "Delete". Also, as you can see, when creating a to-do, there will not be a "danger" button.
Great! Now, let's move to the TodoFormButtons.tsx and add this code:
import {
TODO_MODE_BUTTONS,
TodoModeEnum,
} from '@/utils/constants';
import Link from "next/link";
interface TodoFormButtonsProps {
mode: TodoModeEnum;
}
const TodoFormButtons = ({ mode }: TodoFormButtonsProps) => {
const buttonTypes = TODO_MODE_BUTTONS[mode];
const isReadingMode = mode === TodoModeEnum.READING;
if (isReadingMode) {
return null;
}
return (
<>
<button type="submit" className="btn-secondary">
{buttonTypes.success}
</button>
{buttonTypes.danger ? (
<Link href="/todos" className="btn-tertiary">
{buttonTypes.danger}
</Link>
) : null}
</>
);
};
export default TodoFormButtons;
Here, we use the TODO_MODE_BUTTONS variable from the previous step to get the button types that will be implemented given the specified mode.
In this component, if the mode is "reading", then we will return null because this component is only supposed to be used when mode is "creating" or "editing". That is, when making use of a form component that will be created shortly 👀.
Next, we return 2 buttons:
The "submit" button which will always be present and its content comes from
buttonTypes.success.The "danger" button which will only be present when
modeis editing and whose content comes frombuttonTypes.danger. For that reason, it is aLinkcomponent from Next.js that redirects to the/todospage.
Finally, we have new custom classes (btn-secondary and btn-tertiary), so let's update the globals.css file:
 @tailwind base;
 @tailwind components;
 @tailwind utilities;
@layer components {
.btn {
@apply block border text-white py-2 px-8 rounded-full transition-all hover:bg-white;
}
.btn-primary {
@apply btn bg-black border-black hover:text-black;
}
.btn-secondary {
@apply btn bg-green-500 border-green-500 hover:text-green-500;
}
.btn-tertiary {
@apply btn bg-red-500 border-red-500 hover:text-red-500;
}
}
Now, let's add the content of the TodoReadingButtons component:
import {
  TODO_MODE_BUTTONS,
  TodoModeEnum,
} from '@/utils/constants';
import Link from 'next/link';

interface TodoReadingButtonsProps {
  todoId: string;
}

const TodoReadingButtons = ({
  todoId,
}: TodoReadingButtonsProps) => {
  const buttonTypes =
    TODO_MODE_BUTTONS[TodoModeEnum.READING];

  return (
    <>
      <Link
        href={`/todo/${todoId}/edit`}
        className="btn-secondary"
      >
        {buttonTypes.success}
      </Link>
      <button type="button" className="btn-tertiary">
        {buttonTypes.danger}
      </button>
    </>
  );
};

export default TodoReadingButtons;
This component accepts a todoId parameter that is used as the dynamic value from the "success" button's href.
The default mode is "reading". For this reason, the "success" button is a Link component from Next.js so that we can redirect the user to the edit page of the selected to-do item. And, in this case, the "danger" button is always present compared to its behavior in the TodoFormButtons component.
After that, update the Todo.tsx component by adding this TodoReadingButtons component like this:
import TodoReadingButtons from '@/app/components/TodoReadingButtons';
import { Task } from '@/gql/graphql';

const Todo = ({ title, description, id }: Task) => {
  return (
    <article className="flex flex-col lg:flex-row items-center border border-black rounded-2xl max-w-xl w-full pb-4 lg:pb-0">
      <div className="flex flex-col items-center basis-1/2">
        <header className="p-4 text-center">
          <h2>{title}</h2>
        </header>
        <hr className="w-full" />
        <p className="p-4 text-center">
          {description || 'No description'}
        </p>
      </div>
      <div className="flex justify-center items-center gap-4 basis-1/2">
        <TodoReadingButtons todoId={id} />
      </div>
    </article>
  );
};

export default Todo;
And, finally, import that Todo component inside the TodosPage component. It should end up like this:
import Todo from '@/app/components/Todo';
import { graphql } from '@/gql';
import { getSession } from "@/utils/get-session";
import { getClient } from "@/lib/apolloClient";

// ...

export default async function TodosPage() {
  const session = await getSession();

  const user = session?.user;

  const graphqlClient = getClient();

  const { data } = await graphqlClient.query({
    query: GetAllTasksByAuthorQuery,
    variables: {
      authorEmail: user?.email ?? '',
    }
  });

  const hasTasks = !!data.tasks.length;
  const introSentence = `Hey, ${user?.name ?? 'user'} 👋! ${
    hasTasks
      ? 'These are all of your to-dos:'
      : "You don't have any to-dos yet."
  }`;

  return (
    <section className="min-h-screen px-8 pt-20">
      <header className="mb-12">
        <h1>{introSentence}</h1>
      </header>
      {hasTasks ? (
        <div className="mt-12 flex flex-col items-center justify-center gap-4">
          {data.tasks.map((task) => {
            const {
              id,
              title,
              description,
              done,
              authorEmail,
            } = task;

            return (
              <Todo
                key={id}
                title={title}
                description={description}
                authorEmail={authorEmail}
                done={done}
                id={id}
              />
            );
          })}
        </div>
      ) : null}
    </section>
  );
}
Let's analyze what we have now, from top to bottom:
The
hasTasksvariable is a boolean because we turn the value ofdata.tasks.lengthinto that with the!!operator. It istrueif there are 1 or more to-dos. Andfalseif there are 0.If there are tasks,
introSentenceis a string saying "Hey, (user name) 👋! These are all of your to-dos:". If there aren't, then it says "Hey, (user name) 👋! You don't have any to-dos yet.". This variable is used in theh1from theheader.If there are tasks, we map through the
data.tasksarray. There, we destructure thetaskobject. If there are no tasks, we render nothing.
With this, we are done with the visual aspects of our to-do components.
Now, let's add the create/edit/delete functionalities 👀.
Adding the create and edit functionalities with Server Actions
We are going to create a reusable component that will contain both the create and edit UI. This way we don't create separate components whose difference is minimal.
So, before creating the component, update the next.config.js file to add support to server actions.
/** @type {import('next').NextConfig} */
const nextConfig = {
  experimental: {
    serverActions: true
  }
}

module.exports = nextConfig
After this, create a new server component called TodoForm.tsx file inside the components folder, and add the following layout:
import TodoFormButtons from '@/app/components/TodoFormButtons';
import { Task } from '@/gql/graphql';
import { TodoModeEnum } from '@/utils/constants';

interface TodoFormProps {
  authorEmail: string;
  mode: TodoModeEnum;
  todoData?: Task;
}

const TodoForm = ({
  authorEmail,
  mode,
  todoData,
}: TodoFormProps) => {
  return (
    <form>
      <div className="flex flex-col justify-center items-center gap-4 mb-4 lg:mb-0">
        <div>
          <label htmlFor="title">Title</label>
          <input
            type="text"
            name="title"
            id="title"
            defaultValue={todoData?.title}
            required
          />
        </div>
        <div>
          <label htmlFor="description">Description</label>
          <input
            type="text"
            name="description"
            id="description"
            defaultValue={todoData?.description ?? ''}
          />
        </div>
      </div>
      <div className="flex justify-center items-center gap-4">
        <TodoFormButtons mode={mode} />
      </div>
    </form>
  );
};

export default TodoForm;
This component expects 3 props:
authorEmailwhich is a required string that will be used as the field that determines who the owner of a task is.modewhich is a required string that determines which buttons to rendertodoDatawhich is an optionalTaskitem that will only be used to populate the form inputs when a user is editing that task.
The label, text inputs, and form elements will have base styles, so we can reuse them in case we want to add more forms in our app later. Add the following in the globals.css:
@layer base {
  form {
    @apply flex flex-col lg:flex-row justify-center items-center gap-4 lg:gap-12;
  }
  input[type='text'] {
    @apply block border border-gray-300 rounded-full py-2 px-4 w-full;
  }
  label {
    @apply block mb-2 font-bold;
  }
}
Now, create a new GraphQL file under the graphql folder and call it CreateTask.graphql. Inside, add this code:
mutation CreateTask(
  $authorEmail: String!
  $task: TaskInput!
) {
  createTask(authorEmail: $authorEmail, task: $task) {
    code
    success
    message
    task {
      authorEmail
      id
      title
      description
      done
      createdAt
      updatedAt
    }
  }
}
Now, run npm run generate to generate the types for this mutation.
After that, create a new file under the utils folder and call it add-todo.ts. There, we will store the logic to add to-dos from the server. Inside, add this code to it:
import { graphql } from "@/gql";
import { Task } from "@/gql/graphql";
import { getClient } from '@/lib/apolloClient';

const createTodoMutation = graphql(`mutation CreateTask($authorEmail: String!, $task: TaskInput!) {
  createTask(authorEmail: $authorEmail, task: $task) {
    code
    success
    message
    task {
      authorEmail
      id
      title
      description
      done
      createdAt
      updatedAt
    }
  }
}`);

export async function addTodo(
  newTaskData: Pick<
    Task,
    'title' | 'description' | 'authorEmail'
  >
): Promise<Task | null | undefined> {
  const graphqlClient = getClient();

  const { data, errors } = await graphqlClient.mutate({
    mutation: createTodoMutation,
    variables: {
      authorEmail: newTaskData.authorEmail,
      task: {
        title: newTaskData.title,
        description: newTaskData.description,
      },
    },
  });

  if (errors && errors.length > 0) {
    throw new Error(errors[0].message);
  }

  if (!data?.createTask?.success) {
    throw new Error(data?.createTask?.message);
  }

  return data.createTask.task;
}
Remember to format the string inside the graphql call correctly.
The addTodo function accepts a newTaskData parameter, which is an object with 3 properties: title, description, and authorEmail.
Inside, we use the getClient function we got back when we set up the GraphQL client with the registerApolloClient function from @apollo/experimental-nextjs-app-support/rsc.
Now, we have to call this addTodo function inside a Server Action that we need to create in the TodoForm component. So, let's add this piece of code there:
import { addTodo } from '@/utils/add-todo';
import { redirect } from "next/navigation";
// ...

const TodoForm = ({
  authorEmail,
  mode,
  todoData,
}: TodoFormProps) => {
  async function action(formData: FormData) {
    'use server';
    const title = formData.get('title');
    const description = formData.get('description');

    if (!title || typeof title !== 'string' || !authorEmail)
      return;
    if (description && typeof description !== 'string')
      return;

    await addTodo({
      title,
      description,
      authorEmail,
    });

    redirect('/todos');
  }

  return (
    <form action={action}>
      // ...
    </form>
  );
};
Here, we create an async function called action (you can name it whatever you want) that takes a parameter called formData which is the data coming from the form.
Inside, we add the 'use server'; directive at the top. Then, we check if there's a valid title value, a valid description value in case the user specifies a description of the new task (because remember it is optional) and a valid authorEmail value. If everything is okay, we call the addTodo function.
After the task has been added, we redirect to the /todos path (basically a page reload). This means that once a new task is added, the user gets fresh data because the /todos path is revalidated.
Finally, we pass this action function through the action attribute from the form element.
Now, we have to implement this new TodoForm component inside the TodosPage one. Let's place it between the header and the to-do list.
import TodoForm from "@/app/components/TodoForm";
import { TodoModeEnum } from "@/utils/constants";

// ...

export default async function TodosPage() {
  // ...

  return (
    <section className="min-h-screen px-8 pt-20">
      {/* ... */}
      <div>
        <TodoForm
          authorEmail={user?.email ?? ''}
          mode={TodoModeEnum.CREATING}
        />
      </div>
      {/* ... */}
    </section>
  );
}
With this, now we can add tasks through the form from the /todos page🔥. However, we're still missing the edit logic, so let's make some tweaks to the server action.
First, create a new EditTaskById.graphql file under the graphql folder, and add this code:
mutation EditTaskBody(
  $taskId: ID!
  $newTaskBody: TaskInput!
) {
  editTaskBody(id: $taskId, task: $newTaskBody) {
    code
    success
    message
    task {
      authorEmail
      id
      title
      description
      done
      createdAt
      updatedAt
    }
  }
}
Now, run npm run generate and there'll be a new mutation type called EditTaskBodyMutation. After that, create an edit-todo.ts file inside the utils folder.
import { graphql } from "@/gql";
import { Task } from "@/gql/graphql";
import { getClient } from "@/lib/apolloClient";

const editTaskByIdMutation = graphql(`mutation EditTaskBody($taskId: ID!, $newTaskBody: TaskInput!) {
  editTaskBody(id: $taskId, task: $newTaskBody) {
    code
    success
    message
    task {
      authorEmail
      id
      title
      description
      done
      createdAt
      updatedAt
    }
  }
}`);

export async function editTodo(
  newTaskData: Pick<
    Task,
    'title' | 'description' | 'authorEmail' | 'id'
  >
): Promise<Task | null | undefined> {
  const graphqlClient = getClient();

  const { data, errors } = await graphqlClient.mutate({
    mutation: editTaskByIdMutation,
    variables: {
      newTaskBody: {
        title: newTaskData.title,
        description: newTaskData.description,
      },
      authorEmail: newTaskData.authorEmail,
      taskId: newTaskData.id,
    },
  });

  if (errors && errors.length > 0) {
    throw new Error(errors[0].message);
  }

  if (!data?.editTaskBody?.success) {
    throw new Error(data?.editTaskBody?.message);
  }

   return data?.editTaskBody.task;
};
Now, update the server action from TodoForm component with this:
import TodoButtons from '@/app/components/TodoButtons';
import { Task } from '@/gql/graphql';
import { TodoModeEnum } from '@/utils/constants';
import { addTodo } from '@/utils/add-todo';
import { redirect } from 'next/navigation';
import { editTodo } from "@/utils/edit-todo";

interface TodoFormProps {
  authorEmail: string;
  mode: TodoModeEnum;
  todoData?: Task;
}

const TodoForm = ({
  authorEmail,
  mode,
  todoData,
}: TodoFormProps) => {
  const todoId = todoData?.id ?? '';

  async function action(formData: FormData) {
    'use server';
    const title = formData.get('title');
    const description = formData.get('description');

    if (!title || typeof title !== 'string' || !authorEmail)
      return;
    if (description && typeof description !== 'string')
      return;

    if (mode === TodoModeEnum.CREATING) {
      await addTodo({
        title,
        description,
        authorEmail,
      });
    }

    if (mode === TodoModeEnum.EDITING) {
      await editTodo({
        id: todoId,
        title,
        description,
        authorEmail,
      });
    }

    redirect('/todos');
  }

  return (
    // ...
  );
};

export default TodoForm;
Here, if mode is "creating", addTodo is called; and, if it is equal to "editing", editTodo is called. Also, before that, a constant called todoId is created to hold the value of to-do item passed as prop. It is then used as the value of the id field from editTodo.
After this, let's create the edit to-do page.
Creating the edit to-do page
First, add a new graphql file called GetTaskById.graphql and add this:
query GetTaskById($taskId: ID!) {
  task(id: $taskId) {
    authorEmail
    id
    title
    description
    done
    createdAt
    updatedAt
  }
}
After this, let's create a new todo folder inside the app directory. Inside this folder, add a dynamic route and call it [id]. Then, create a folder called edit inside that route and finally, add a page.tsx file there:
import TodoForm from "@/app/components/TodoForm";
import { graphql } from "@/gql";
import { getClient } from "@/lib/apolloClient";
import { TodoModeEnum } from "@/utils/constants";
import { getSession } from "@/utils/get-session";
import { notFound } from "next/navigation";

const GetTaskByIdQuery = graphql(`query GetTaskById($taskId: ID!) {
  task(id: $taskId) {
    authorEmail
    id
    title
    description
    done
    createdAt
    updatedAt
  }
}`)

const EditTodoPage = async ({
  params,
}: {
  params: { id: string };
}) => {
  const session = await getSession();

  const userEmail = session?.user?.email || '';

  const graphqlClient = getClient();

  const { data } = await graphqlClient.query({
    query: GetTaskByIdQuery,
    variables: {
      taskId: params.id,
    },
  });

  const task = data.task;

  if (!task || task.authorEmail !== userEmail) {
    notFound();
  }

  return (
    <section className="min-h-screen px-8 flex flex-col justify-center items-center">
      <h2 className="mb-8 font-bold text-2xl">
        Editing To-do
      </h2>
      <TodoForm
        mode={TodoModeEnum.EDITING}
        authorEmail={userEmail}
        todoData={task}
      />
    </section>
  );
};

export default EditTodoPage;
First, GetTaskByIdQuery is the query we created previously and is used as the value of the query field from the GraphQL client's query method.
Next, as this is a Dynamic Segment, we have access to a params property that holds all the dynamic routes. In our case, id is the only dynamic route as specified in the [id] folder created before. This id value is then passed in as the value of the taskId field that is required when executing the GetTaskById query.
Finally, the content of this page is displayed only if there is a found task and the currently logged-in user's email is the same as the author's email of the found task. If no task was found or the emails do not match, the notFound function from Next.js is called to render a Not Found UI.
Creating a not found to-do page
If you want to customize the "Not Found" UI, you can do so by creating a not-found.tsx file inside the same folder of the page.tsx file. Add this content to it:
import Link from "next/link";

const NotFound = () => {
  return (
    <section className="min-h-screen px-8 flex flex-col justify-center items-center">
      <h2 className="text-2xl font-bold">Not Found</h2>
      <p className="mb-4">Could not find requested to-do item 🫤</p>
      <Link href="/todos" className="btn-primary">See all to-dos</Link>
    </section>
  );
};

export default NotFound;
Up to this point, we're only missing the delete functionality 👀. So, let's do it.
Running mutations on Client Components
So far, we have not implemented any code to run queries/mutations on client components. For that reason, we will do so with the Delete button so that you get to see how this can be achieved on the client.
First, let's create a new graphql file called DeleteTask.graphql and add this code:
mutation DeleteTask($taskId: ID!) {
  deleteTask(id: $taskId) {
    code
    success
    message
  }
}
Then run npm run generate to generate the types.
Next, create a new client component called DeleteTodoButton, and add this code to it:
'use client';

import { graphql } from "@/gql";
import { useMutation } from "@apollo/client";
import { useRouter } from "next/navigation";
import { PropsWithChildren } from "react";

interface DeleteTodoButtonProps {
  taskId: string;
}

const DeleteTodoMutation = graphql(`mutation DeleteTask($taskId: ID!) {
  deleteTask(id: $taskId) {
    code
    success
    message
  }
}`)

const DeleteTodoButton = ({
  taskId,
  children
}: PropsWithChildren<DeleteTodoButtonProps>) => {
  const router = useRouter();

  const [deleteTodo, { loading }] = useMutation(
    DeleteTodoMutation,
    {
      onCompleted: () => {
        router.refresh();
      },
    }
  );

  const handleClick = async () => {
    await deleteTodo({
      variables: {
        taskId,
      },
    });
  };

  return (
    <button
      type="button"
      className="btn-tertiary"
      onClick={handleClick}
      disabled={loading}
    >
      {children}
    </button>
  );
};

export default DeleteTodoButton;
Here, we use the 'use client'; directive to mark this as a client component.
A constant called DeleteTodoMutation is created to hold the mutation operation to be run.
This component accepts two props: children, which is the content of the button, and taskId which is the selected to-do's ID that is passed in as the value of the taskId parameter from the mutation operation.
We make use of the useRouter hook from next/navigation as it will be used to refresh the current page after deleting a to-do.
Below, we use the useMutation hook from @apollo/client to execute our mutations. It accepts a mutation as its first parameter (the DeleteTodoMutation constant from above), and an options object as its second. As an option, we provide the onCompleted callback function that's called when a mutation successfully completes with zero errors. Inside, we call the refresh method from the useRouter hook. With this, every time a mutation completes, the /todos route will be refreshed and we will get fresh data.
This useMutation hook returns an array of two items: the first one is a mutate function you need to call to trigger the mutation, and the second is an object.
The mutation function accepts an options object as its only parameter. Any option included here will override any existing value for that option that you passed to useMutation. This means there are options that you can actually pass directly to the options object from the useMutation (which is the case of the variables option we pass to the mutate function). Also, this function returns a promise, that's why we await it.
The object that is returned as the second item includes several items you can use based on your needs. In our case, we get the loading boolean to set the enabled/disabled state of the button.
Finally, let's swap out the old delete button from the TodoReadingButtons component with this new component:
import DeleteTodoButton from '@/app/components/DeleteTodoButton';
import {
  TODO_MODE_BUTTONS,
  TodoModeEnum,
} from '@/utils/constants';
import Link from 'next/link';

interface TodoReadingButtonsProps {
  todoId: string;
}

const TodoReadingButtons = ({
  todoId,
}: TodoReadingButtonsProps) => {
  const buttonTypes =
    TODO_MODE_BUTTONS[TodoModeEnum.READING];

  return (
    <>
      <Link
        href={`/todo/${todoId}/edit`}
        className="btn-secondary"
      >
        {buttonTypes.success}
      </Link>
      <DeleteTodoButton taskId={todoId}>
        {buttonTypes.danger}
      </DeleteTodoButton>
    </>
  );
};

export default TodoReadingButtons;
Having done this, all 4 functionalities (create, read, update, delete) are now implemented and our app should be good to be deployed to production🔥.
By the way, you might wonder about the logic to update the done status of a to-do. Well, I want to challenge you to implement that on your own and write a comment saying how you did it, what you changed, etc... 👀
Deploying the front-end 🚀
As you might have expected, we're going to deploy this app on Vercel. Follow the steps to deploy an app and that should be it.
Environment Variables
NEXTAUTH_URL- we don't need to define this one because Vercel reads theVERCEL_URLenvironment variable. However, if your Next.js app uses a custom base path (not this case), you'll need to include this environment variable and specify the route to the API endpoint in full as highlighted in the NEXTAUTH_URL variable documentation.NEXTAUTH_SECRET- as mentioned earlier, you can useopenssl rand -base64 32in a terminal or generate-secret.vercel.app/32 to generate a random value.GITHUB_IDandGITHUB_SECRET- copy their values from the.envfile. If you don't have them, go back to the 7th step from the "Setting up authentication with NextAuth section".NEXT_PUBLIC_GRAPHQL_URI- prod URL of your GraphQL server.
While NEXTAUTH_URL and NEXTAUTH_SECRET are optional during development, they're required on production. If you don't set them up, your app will run into errors.
Post-deployment update
Now, after we have successfully deployed the app, remember to update the "Homepage URL" and "Callback URL" fields from the GitHub app we created at the beginning to set up authentication with NextAuth. Otherwise, this flow will not work as I mentioned back then.
So, let's head over to https://github.com/settings/apps again and edit the app. There, swap out http://localhost:3000 from "Homepage URL" and "Callback URL" with the full URL you got after deploying on Vercel.
We've come to the end of this article. I want to thank you if you got to this point 👏. Hope you learned a lot and enjoyed reading!
Here is the backend repository and the frontend one if you would like to check them out! You can also find a preview of the app in the README.md file of the frontend repo.